Journal Entry Manager allows administrators to configure the Journals grid to meet their needs. Use the Grid Column Settings to manage fields displayed within the Journals grid.
IMPORTANT: This page is available only to administrators.
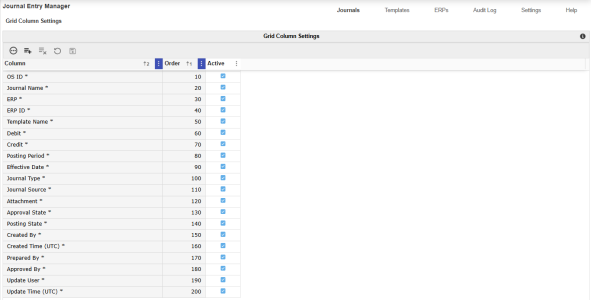
By default, standard columns are always available, including:
-
OSID
-
Journal Name
-
ERP
-
ERP ID
-
Template Name
-
Debit
-
Credit
-
Posting Period
-
Effective Date
-
Journal Type
-
Journal Source
-
Attachment
-
Approval State
-
Posting State
-
Created By
-
Created Time (UTC)
-
Prepared By
-
Approved By
-
Update User
-
Update Time (UTC)
You also have the option to add custom columns and arrange them to suit organizational requirements. These columns can be assigned to specific ERP Fields, facilitating the grouping of similar data across different ERPs into single columns where naming conventions may differ.
This page has validations that include:
-
Column Names must be unique and less than or equal to 50 characters or fewer.
-
Special characters are removed upon saving. Standard columns cannot be edited or deleted but can be inactivated.
Journal Grid
Once a grid column is added, it will display in the journals grid. See Grid Toolbar.
Add a Column
-
Go to Journals > Grid Column Settings.
-
Click the Insert Row button.
-
Enter a Column name.
-
Input an Order value.
-
Select the checkbox to set a column as active.
-
Click the Save button.
Delete a Column
-
Select a Column field.
-
Click the Delete Row button.


